Adding a New Admin User
Sign into the Admin Portal: admin.site360.io
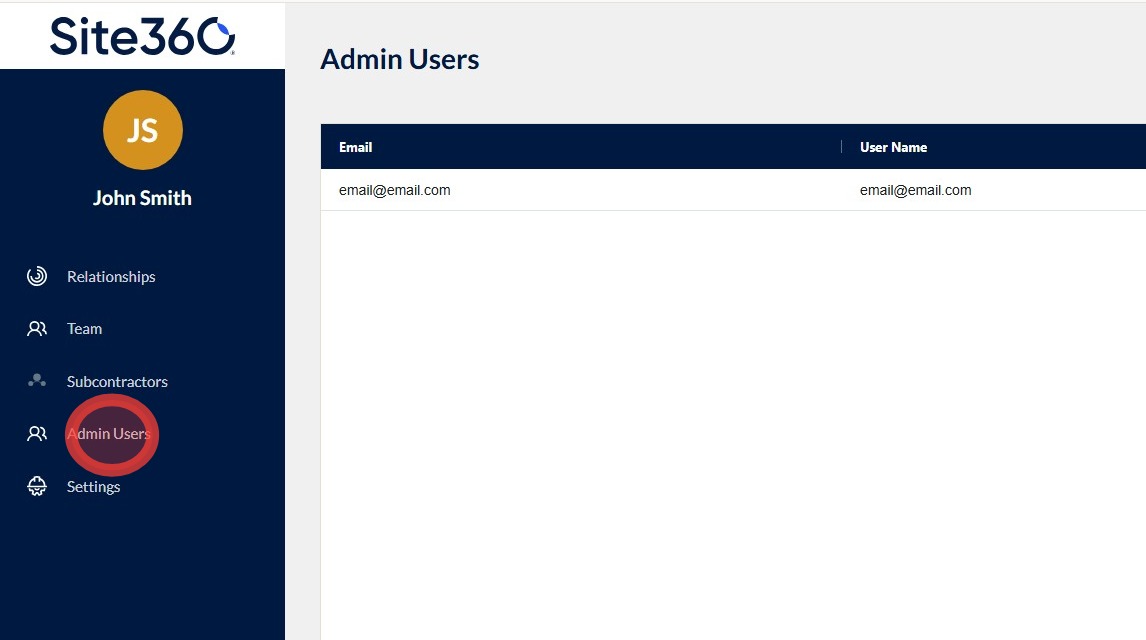
When you sign in it will take you directly to the Relationships tab. Click Admin Users in the left navigation column.
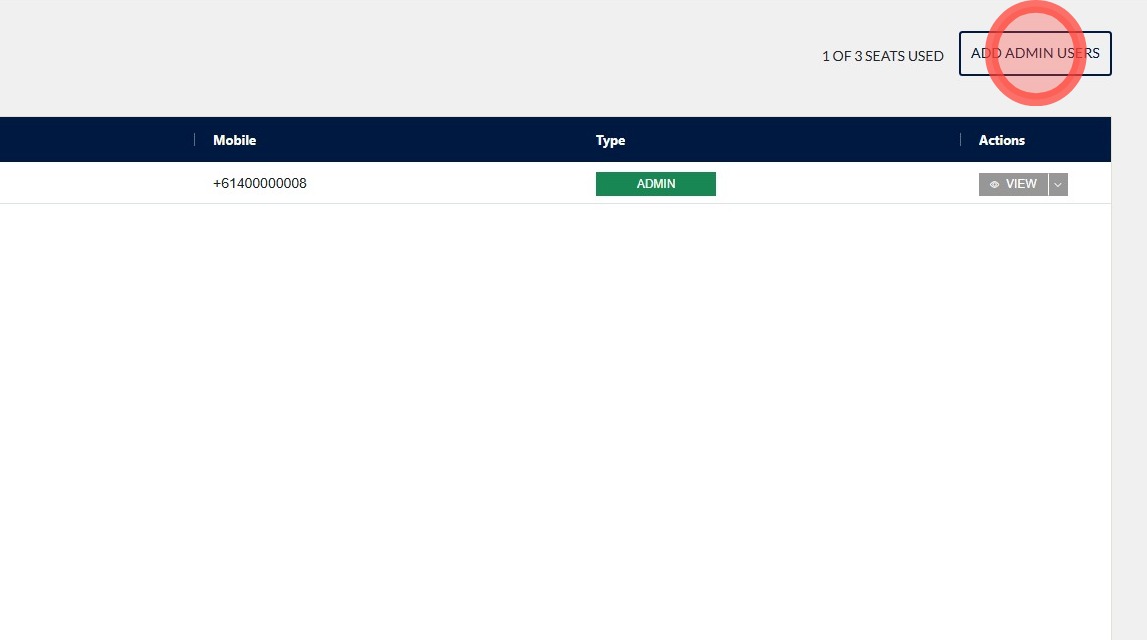
Click Add Admin User in the top right corner.
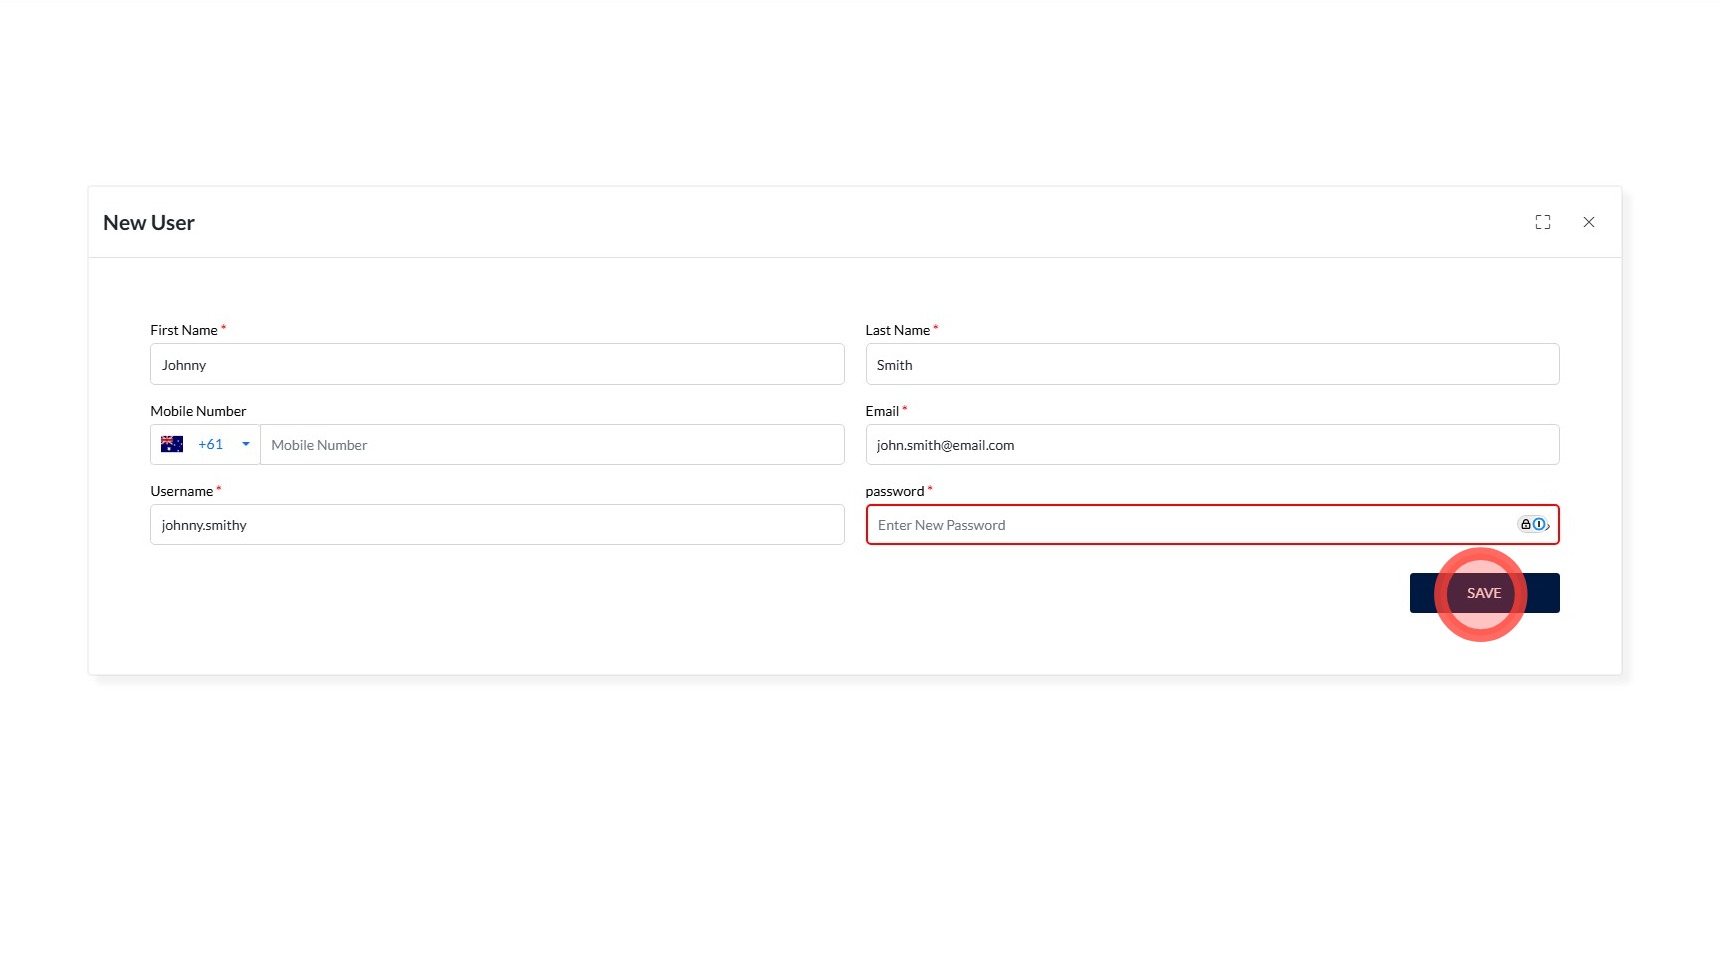
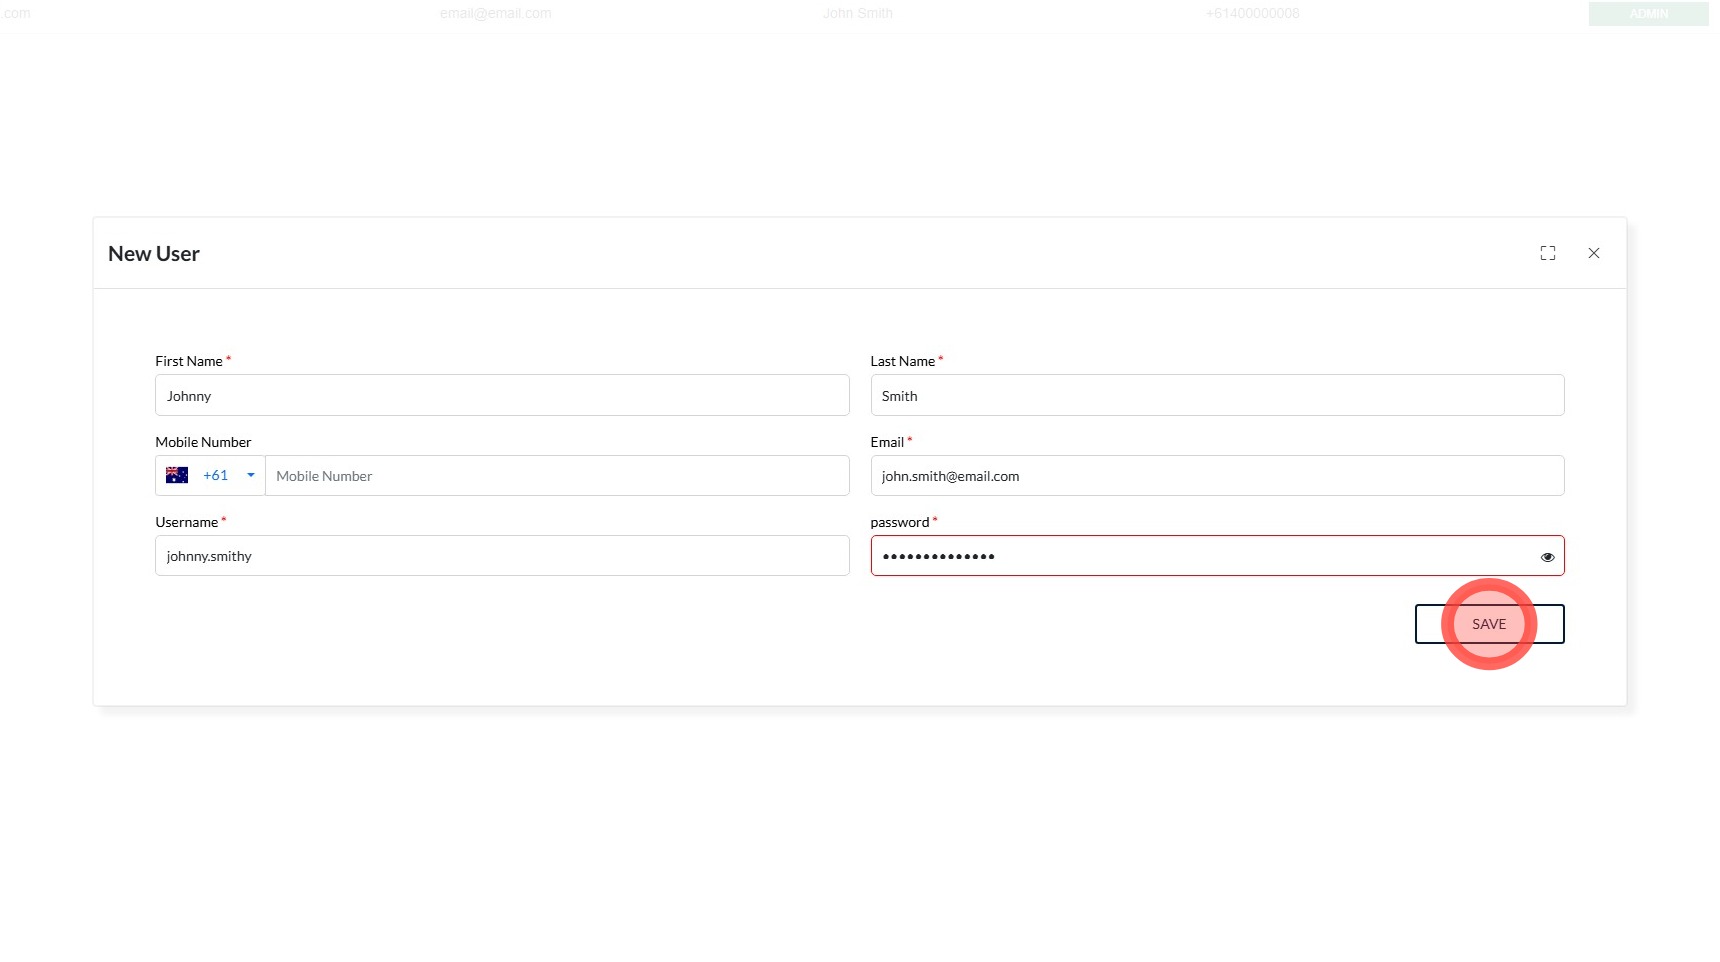
Enter the user's information into the required fields:
- First Name
- Last Name
- Mobile (A mobile number is optional)
- Username
- Password
Once you have filled in the required fields, click Save.
Please note: passwords need to contain the following four types of characters:
- At least one uppercase (A-Z)
- At least one numeric (0-9)
- At least one special character (i.e !@$%&* (including space))
- Minimum eight characters
Editing an Admin User
To edit an admin user's details, click the drop-down arrow next to the View button, then click Edit.
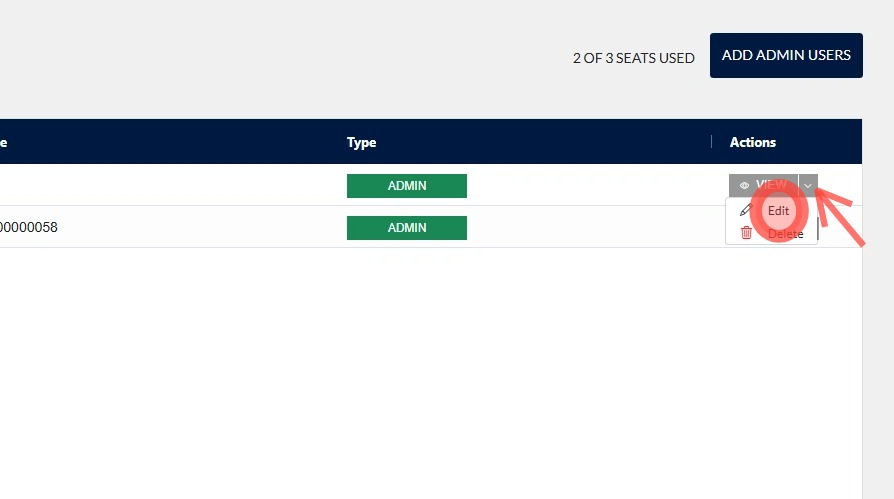
Update the fields that need to be changed, then click Save.
Removing an Admin User
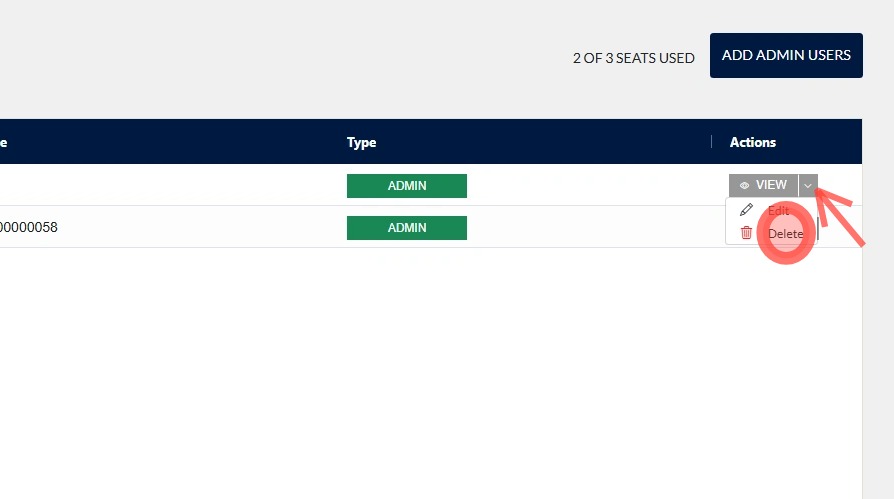
To remove an admin user, click the drop-down arrow next to the View button, then click Delete.
The user will now be deleted and no longer have access to the admin portal.
Still need a hand?
Reach out to the Site360 Support team and we'll get you sorted.
Was this article helpful?
That’s Great!
Thank you for your feedback
Sorry! We couldn't be helpful
Thank you for your feedback
Feedback sent
We appreciate your effort and will try to fix the article